The Complete Guide to Lawn Sprinkler Setup for a Rich Lawn
A well-designed sprinkler system does more than save you from dragging hoses around. It delivers the right water, at the right time, with fewer weeds, fewer brown patches, and less runoff. Done poorly, it becomes a constant headache of puddles, weak pressure, and frequent sprinkler repair. After designing and installing systems from small city yards to wide suburban lots, I’ve learned that the difference between success and frustration lives in the planning. The parts matter, but the layout and water math matter more.
What a Good System Actually Delivers
A good lawn irrigation system spreads water evenly so the worst and best watered spots stay within 10 to 15 percent of each other. It runs quietly, doesn’t hammer your plumbing, and can handle a windy afternoon without throwing half your budget into the street. Good systems match the soil’s intake rate, manage slope, and respect local watering rules. You’ll see deeper roots and fewer fungal issues because the lawn gets longer, less frequent drinks that soak in rather than sheet off.
You’ll also notice where quality shows up. Heads set to the correct grade don’t get scalped by mowers. Valves grouped in a thoughtful manifold reduce digging when a solenoid fails. Smart controllers stop running in the rain and shorten cycles during cool, humid spells. And routine sprinkler maintenance becomes straightforward because you can predict what needs attention and when.
Know Your Water and Your Yard Before You Sketch
Good design starts with numbers. If you design a system without confirming pressure and flow, you’re rolling the dice. Two side-by-side homes can differ by 15 to 25 PSI at the hose bib, and that alone can make or break a zone of rotors.
Test pressure with a simple gauge threaded onto an outdoor spigot. You want to know static pressure, meaning everything closed, and dynamic pressure while running water. Then measure available flow in gallons per minute, not by guessing at pipe size, but by timing how long it takes to fill a known container. For example, if it takes 15 seconds to fill a 5 gallon bucket at a tap, you have around 20 GPM at that point, though you’ll want to design with a margin so you don’t starve the system once friction losses kick in.
The meter and main line size matter too. A three-quarter inch service line behaves very differently than a one inch line over a 60 to 100 foot run. Each valve, 90-degree elbow, and length of pipe adds friction. Designers calculate this with charts, but a conservative rule is to keep per-zone demand at 80 percent or less of your measured dynamic flow. If you have 12 GPM reliable flow at 50 PSI dynamic, design each zone for 9 to 10 GPM. Your controller can stagger zones to water the whole lawn.
Now walk the yard. Observe grade, soil, sun, wind corridors, and planting beds. A loam that drinks water eagerly can accept 0.4 inches per hour. Heavy clay on a slope may only take 0.15 inches per hour before runoff. That difference tells you whether to favor rotary nozzles with lower precipitation rates or short-throw sprays that deliver more quickly in calm, flat areas.
Heads, Nozzles, and Why Matching Precipitation Rates Matters
Most residential systems use a mix of spray heads and rotors. Sprays throw a fixed fan of water, great for smaller turf, tight shapes, or strips between sidewalk and street. Rotors sweep back and forth, covering larger areas efficiently. In recent years, multi-stream rotary nozzles have become a workhorse for mid-size turf because they deliver gentler streams that resist wind and soak into tight soils without runoff.
The trap many homeowners fall into is mixing different precipitation rates within one zone. If sprays in one corner put down 1.5 to 2.0 inches per hour and rotors elsewhere deliver 0.5 to 0.7 inches per hour, you can’t water both evenly with the same runtime. You’ll either drown one side or starve the other. Keep zones consistent: sprays with sprays, rotors with rotors, rotary nozzles with other similar nozzles. You can mix arc angles within a zone, but size nozzles so that a quarter arc head applies half the flow of a half arc, which in turn applies half the flow of a full circle. Most manufacturers provide nozzle charts that make it easy to select matching sets.
Head spacing matters just as much. Aim for head-to-head coverage, meaning the edge of one head’s throw reaches the next head. That overlap is not wasteful. It corrects for wind, evaporation, and the reality that water distribution is heaviest near the head and lighter at the edge. In practice, 12-to-15-foot sprays spaced 12 feet apart in a grid give solid uniformity. Rotors that throw 30 to 40 feet typically like 30 to 35-foot spacing under calm conditions.
Layout, Zones, and Real-World Compromises
On paper, zones break out by plant water needs, sun exposure, and head type. Turf usually sits on its own zones, with shade and sun split if possible. Drip irrigation works beautifully in planting beds, courtyards, and around trees where overspray onto hardscape is a nuisance. If the budget is tight, you can plan for future drip by stubbing out capped tees near beds and running them as separate valves later.
Property constraints force compromises. A narrow triangular patch between driveway and walk may need specialty nozzles that taper to avoid misting cars and pavement. Windy sites may push you toward lower arc heights, closer spacing, or even a low precipitation rotary nozzle that throws denser streams. In small yards with low pressure, a rotor zone may not be feasible at all, so break the area into two smaller spray zones. Don’t fight the physics; divide to conquer.
It pays to sketch your yard to scale. Even a 1 inch equals 10 feet drawing on graph paper will surface problems early. Mark utilities, trees, hardscape, slope, and where you plan the backflow preventer. Place heads around perimeters first, then fill the interior. Estimate zone flows by summing nozzle GPMs and check them against your measured supply. If a zone creeps over your design target, split it.
The Core Installation Sequence
If you’re handy and fine with a few long days, you can install a clean system without surprises. The rhythm is predictable if you handle prep and staging well.
- Confirm water source, pressure, and flow, then pull permits if required and choose the correct backflow preventer type per local code.
- Build the manifold and mount the backflow and master shutoff, then run mainline pipe to the manifold location and test for leaks before trenching the whole site.
- Trench for main and lateral lines, lay pipe with sweeps instead of tight 90s where possible, install valves and lateral tees, and flush lines before attaching heads.
- Set heads on swing joints or funny pipe, establish height to finish grade, set arcs roughly, backfill in lifts, and compact the soil around each head to prevent settling.
- Wire valves to the controller with waterproof connectors, label everything, program initial schedules, and test each zone while fine-tuning arcs, distances, and nozzles.
Those are the bones. The details and the judgment calls make it work.
Trenching, Pipe Materials, and Fitting Choices
PVC and polyethylene both have their place. In much of the United States, schedule 40 PVC is common for mainlines and class 200 or schedule 40 PVC for laterals. Cold-climate installers often prefer black poly pipe for laterals because it flexes with frost heave and uses barbed fittings with clamps. Soil type and local practice should guide you. If you are in rocky ground, poly has an edge. If you want crisp, rigid runs with solvent-welded joints, PVC is tidy.
Depth is not a guess. Local codes or best practice usually call for 8 to 12 inches of cover over laterals, deeper for mainlines feeding the manifold and backflow. That depth protects against incidental shovel strikes and helps with temperature stability. Avoid tight elbows when you can, since every 90-degree turn adds equivalent length in friction loss. Where direction changes are necessary, long sweeps reduce pressure drop.
Take time with solvent welding if you use PVC. Wipe dirt from pipe ends, dry-fit to confirm length, then prime and cement quickly, making a clean quarter turn as you seat the joint. Give each joint a few minutes to set before pressurizing, especially on large diameters that take more cement. A rushed joint will make you dig twice. I’ve repaired far too many weeping fittings buried by someone who cut corners on cure time.
Valves, Manifolds, and Backflow Protection
Valves are the traffic signals of your irrigation system. Group them in a manifold so you can isolate a single zone without shutting everything down. Use unions or swing joints so you can remove a valve for service. Protection matters too. Install a filter screen upstream if your water source carries sand or silt, and include a master shutoff so you can winterize and service without chasing the meter box.
Backflow preventers protect your drinking water from contamination. The correct device depends on your plumbing configuration and local code. Pressure vacuum breakers are common on lawn systems in many regions, but they must sit above the highest downstream head. Double check valve assemblies often serve systems where elevation and code allow. Reduced pressure zone assemblies provide the highest protection but introduce more pressure loss and require proper drainage. Don’t guess here. Check with your jurisdiction or a licensed plumber, because inspectors look closely at backflow and placement.
Wiring and Controllers That Make Life Easier
Most residential valves operate on 24-volt AC. Use direct-burial irrigation wire with enough conductors for all zones plus at least one spare. One common wire runs to every valve, and a colored wire returns from each zone to the controller. Waterproof connectors, not wire nuts from the electrical aisle, are nonnegotiable. I prefer gel-filled crimp connectors designed for irrigation.
Controllers have evolved quickly. A basic indoor timer will run your zones on set days and times. Smart controllers use local weather data and even on-site sensors to adjust runtimes and delay for rain. They are worth the modest premium because they reduce waste and nudge schedules to match real conditions. Set up zones in the app or menu with accurate nozzle types and soil so the algorithms have a solid foundation. If you already have a controller, check if it supports add-ons like rain, freeze, or flow sensors. A flow sensor paired with a master valve can shut down the system when a lateral line breaks, which can save a basement or a neighbor’s slope from an overnight gusher.
Installing and Setting Heads So They Stay Put
Spend an extra five minutes on each head location and you save yourself hours of sprinkler repair later. Use a swing joint or a length of flexible funny pipe from the lateral tee to the head. This isolates the head from soil movement and mower bumps. Place the head so the top is level with finished grade, not the temporary trench edge. In soft soils, compact the dirt under and around the head in lifts, watering lightly if needed so it won’t settle an inch low after the first rain.
Flush each lateral before you attach the head. A surprising amount of grit hides in pipe runs and will clog a nozzle on day one. Once attached, start the zone and adjust arcs with a screwdriver while the water is running. You’ll see overspray and can fine-tune distance. Small quarter-arc heads near walks should be turned down so they kiss the edge of pavement, not mist the whole sidewalk.
Startup, Tuning, and Real Schedules
The first month tells you a lot. Set conservative schedules based on nozzle precipitation rates. For sprays, a common starting point is 10 to 12 minutes per cycle, two to three cycles with 30 to 45 minutes between starts on watering days, which creates a cycle-and-soak effect that prevents runoff. For rotary nozzles or rotors, you might run 25 to 45 minutes per cycle, depending on throw and soil.
Observe. Look for dry wedges between heads, the classic sign of poor overlap or wind drift. Head-to-head spacing is the cure, but you can improve uniformity by swapping nozzles or adding a mid-run head where coverage is weakest. If you see puddles on clay soils, cut run times and increase the number of shorter cycles. A screwdriver and a nozzle tree in your pocket during the first few waterings make for quick corrections.
A catch-can test gives hard numbers on uniformity. Place tuna cans or rain gauges in a grid across the lawn, run a cycle, and compare depths. If one corner shows half the water of another, adjust nozzle sizes or throw distances. Ten minutes with cans beats weeks of guessing.
Seasonal Sprinkler Maintenance That Prevents Big Repairs
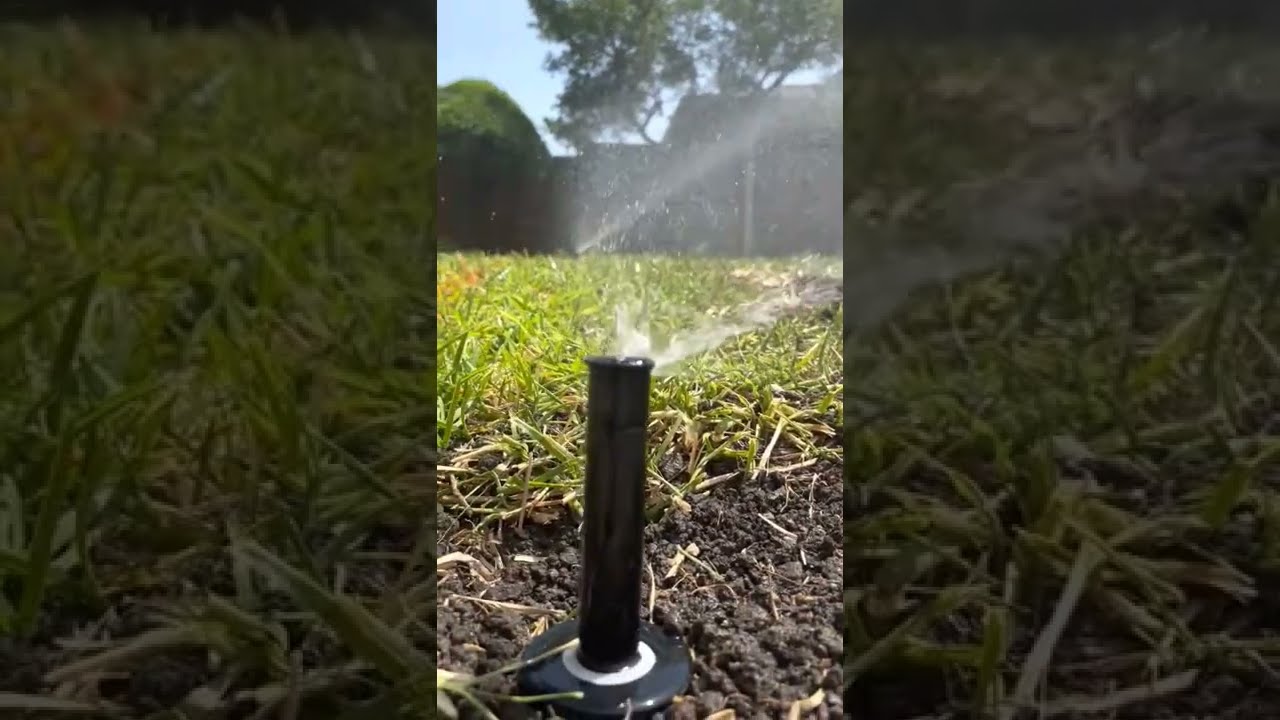
An irrigation system is not set-and-forget. It needs occasional attention, most of it straightforward. Once a season, walk every zone. Pull a few nozzles and rinse the screens. Re-level heads that have tilted from soil movement. Look for wet spots with the system off, a classic sign of a leaking valve or a lateral fitting. Test the rain or freeze sensor if installed. Minor tune-ups reduce water bills and prolong the life of your lawn and your system.
For cold climates, winterization is nonnegotiable. Blowouts with an air compressor must be done commercial sprinkler installation available at modest pressure, usually 50 to 60 PSI for residential systems, and in short bursts. Over-pressurizing with air can damage heads and valves. If you don’t have the equipment, hire it out. A broken manifold in January is a far pricier lesson.
Here is a short seasonal checklist that keeps things reliable:
- Spring: open the main valve slowly, pressurize the system, and flush lines before reinstalling nozzles; test each zone and correct arcs.
- Mid-summer: reduce misting by lowering pressure at the valve or swapping to larger nozzles on overly fine sprays; raise the mowing height to reduce evapotranspiration.
- After landscaping projects: recheck head heights and coverage around new edging, sod patches, or shrubs that can block streams.
- Fall: shorten runtimes as temperatures drop; test and date-stamp your backflow preventer inspection if required; prepare for winterization.
- After repairs: run a full cycle and read the water meter to ensure no slow leaks are lurking.
Troubleshooting and Practical Sprinkler Repair
Problems usually fall into a few patterns, and a simple process catches them quickly. If one zone is weak but others are fine, suspect a partially closed valve, a clogged filter screen under a nozzle, or a cracked lateral line. Run that zone and walk the line. Listen for hissing, feel for soggy soil, and watch the meter. If the zone runs but heads barely rise, look for a break upstream of the first head.
If a zone won’t start, swap that zone wire at the controller with a working one. If the problem moves, it is a controller or wiring fault. If it doesn’t, the valve or solenoid is likely at fault. Many valves can be opened manually with a quarter turn on the bleed screw. If manual operation works but the controller doesn’t, test voltage at the valve. You want around 24 to 28 volts AC when the zone should be on. No voltage, check splices; good voltage but no movement points at the solenoid or valve diaphragm.
Ghost flow - the faint trickle at heads when the system is off - often means debris lodged in a valve, a failing valve seat, or a missing check valve in a head on a slope. Disassemble the suspect valve, rinse the diaphragm and seat, and reassemble. If you see visible wear or tears, replace the diaphragm kit. It is a simple, inexpensive sprinkler repair that often restores crisp shutoffs.
Overspray and mist usually indicate too much pressure at the heads. Mist carries off in the breeze and never reaches the soil. Install pressure-regulating stems or bodies that reduce each head to a stable 30 PSI for sprays or 45 PSI for rotors, or use zone pressure regulation at the valve if compatible. Many modern heads include built-in pressure regulation, and they are worth the upgrade when old bodies wear out.
Water Efficiency and Smarter Scheduling
Efficiency is not only about saving water. Lawns struggle on feast-or-famine schedules. The goal is to replace what your lawn uses, no more. Evapotranspiration varies by climate, but a cool-season turf in summer might use 1 to 1.5 inches of water per week, sometimes more in hot, windy conditions. If your system delivers 0.5 inches per cycle, you’ll need two to three cycles per week during peak demand, less in spring and fall.
Cycle-and-soak programming turns one long run into several shorter ones with spacing so water can infiltrate. For example, two 15-minute cycles on a rotor zone with a 45-minute gap can outperform a single 30-minute run by preventing runoff down a gentle slope. Rain sensors or soil moisture sensors add another layer of control. Pausing a cycle after a surprise thunderstorm is the easiest savings you’ll ever see.
Drip irrigation excels in beds because it places water at the root zone and avoids foliage, which can reduce mildew and weed pressure. Use pressure-compensating emitters and a filter-regulator assembly on each drip zone. Keep drip on separate valves from turf, since the runtimes and pressures differ. It is common for drip to run for an hour or more to deliver the same depth of water that sprays deliver in minutes.
Safety, Codes, and What You Can’t See Underground
Permits are not red tape for fun. Some jurisdictions require them for backflow work or new irrigation, and inspectors want to see correct device types and installation heights. Backflow preventers that sit too low or drain incorrectly can fail their test and require rework.
Before trenching, call your utility locate service. In the United States, 811 will mark gas, electric, cable, and telecommunications. Private lines to outbuildings, lighting, or a pool heater might not be marked, so ask about site history and look for telltale signs like conduit stubs or patched trenches. I’ve seen a trencher nick a shallow low-voltage cable and create a day of detective work for a landscape lighting system. A simple hand dig around suspected crossings prevents both danger and expense.
When to DIY and When to Hire
If you’re comfortable with plumbing, simple wiring, and mapping a yard, a homeowner can install a clean, efficient system over a few weekends. The learning curve is real, but so is the satisfaction when you see even arcs snapping to the edge of the lawn at dusk. Rent a trencher to save your back, stage materials in advance, and feel free to bring in a pro for the backflow assembly if your code or comfort calls for it.
Hire a professional when you have complex elevation changes, low pressure paired with a large lawn that needs careful hydraulic design, or tight local codes around backflow and inspections. A seasoned crew brings speed, compact trenching, and a truck stocked with fittings you don’t think you need until you do. You also get warranty support, which matters if a valve body cracks or a controller fails mid-season.
What It Costs and Where the Money Goes
Costs vary by region and lawn size, but some ballparks help. A typical suburban lot with 6 to 10 zones often lands in the 4,000 to 12,000 dollar range for a professional installation, including trenching, valves, heads, controller, and backflow. DIY projects with similar scope can be done for 2,000 to 6,000 dollars in materials if you already own or rent the tools, but add your time and potential permit fees.
Where does the budget land? Heads and nozzles add up, easily a few hundred dollars per zone depending on type and count. Valve manifolds and backflow gear absorb a chunk, especially if code drives you to a reduced pressure assembly. Smart controllers and sensors can add 150 to 600 dollars, depending on features. Pipe, fittings, wire, and connectors look cheap but multiply quickly across a whole yard. Quality pays off here. A pressure-regulated head costs a little more, but it saves water and reduces misting, which helps the system deliver consistently.
Handling Odd Shapes, Slopes, and Wind
Real lawns are rarely rectangles. For arcs along curved beds, stagger head spacing to maintain head-to-head coverage along the arc, then fill gaps inside the curve with short-throw heads or matched-precipitation specialty nozzles. For narrow strips, consider strip-pattern sprays that throw a long rectangle rather than a fan.
Slopes demand patience. Split the slope into its own zones so you can use cycle-and-soak and lower precipitation rates. Heads with built-in check valves prevent low-head drainage that turns sidewalks into algae farms. If your site sees steady afternoon wind, orient rotor arcs so they sweep with the prevailing direction and consider lowering the height of spray arcs. Multi-stream rotary nozzles, which throw larger droplets in slow-moving streams, shine in these conditions.
A Note on Long-Term Reliability
Systems age. Gaskets in heads harden over 7 to 12 years. Solenoids last a long time but are not immortal. A bit of planned sprinkler maintenance outlives the short-term savings of bargain-bin parts. When I open a valve box with watertight connectors, labeled wires, and unions on the manifold, I know the owner or installer thought ahead. Future you will appreciate those touches when a repair takes 15 minutes rather than an afternoon.
Keep simple records: a hand sketch with valve locations, zone numbers, head types, and nozzle sizes. Tape a copy inside the controller cabinet. When a head breaks, you’ll know what nozzle to grab without pulling three variants off the shelf.
Bringing It All Together
Sprinkler installation is a craft built from small, sensible decisions stacked in the right order. Measure water before you design. Group heads by type and match precipitation rates. Lay pipe with respect for friction and frost. Protect your potable water with the correct backflow device. Use swing joints and set heads to finished grade. Program schedules to match soil and season. Then walk the system a couple of times a year and handle the small tasks that prevent big problems.
Whether you hire a crew or shoulder the shovel yourself, the goal is the same: even coverage, efficient operation, and a lawn that stays resilient through heat and shoulder seasons alike. When arcs meet just at the edge and the lawn drinks what it needs without waste, you’ll know the system is doing what it was built to do. And when something eventually needs attention, a thoughtful layout and a steady maintenance habit turn sprinkler repair from a dreaded chore into a quick, predictable fix.